Used to group values on the name given.it can be applied only on pick list, number, text fields
How To Create Bucket Fields In Your Salesforce Reports
Another great question has been asked to our certified Salesforce developers. The question was “how do I use bucket fields in my Salesforce reports?”Bucketing lets you quickly categorize report records without creating a formula or a custom field within Salesforce.When you create a bucket field, you define multiple categories (buckets) that are used to group report values. We have created simple step by step instructions on how to create this report.
If you follow these step by step instructions for creating a bucket field in your Salesforce CRM:
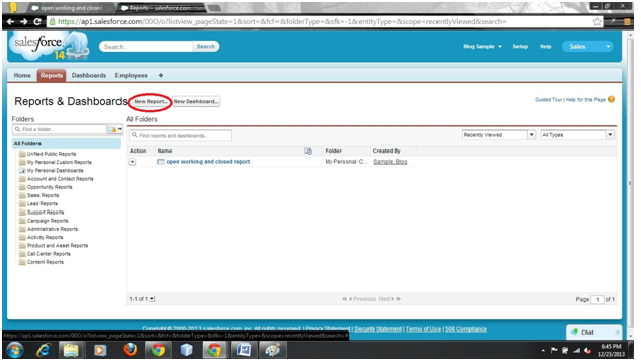
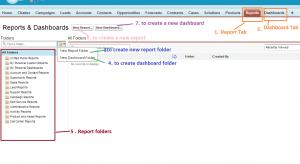
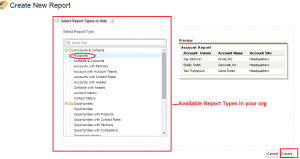
Step 1 – In the report tab click on the “New Report” button
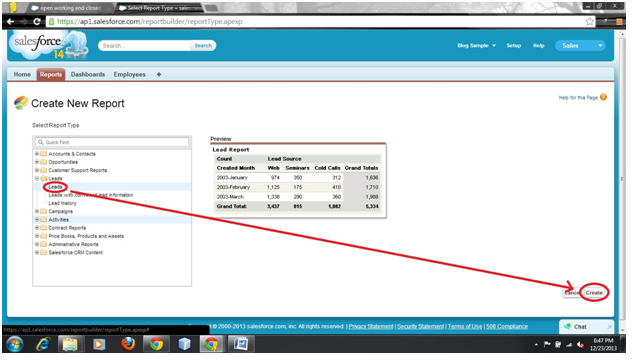
Step2 -Select a “Lead”and then create a new report
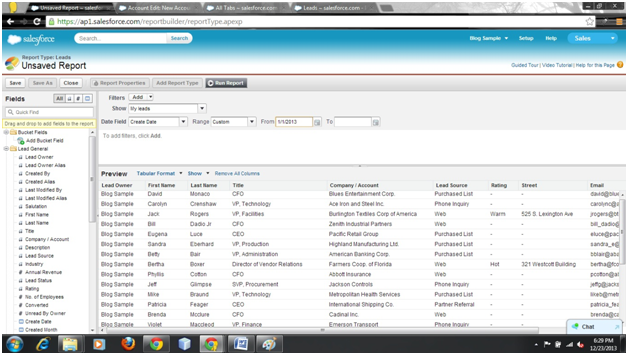
 ;
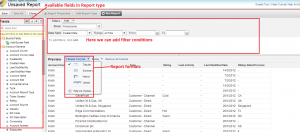
;Step3 - Here you will find the bucket field in the top of list of fields
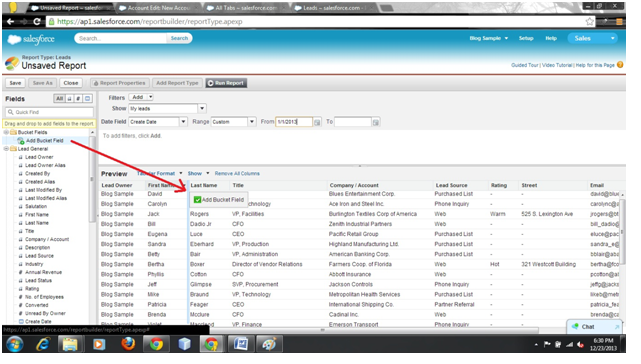
Step4 - Add this “Bucket Field” into your report
Step 5 -Here you will get a popup window called “Edit Bucket Field”
Select the lead status in your source column
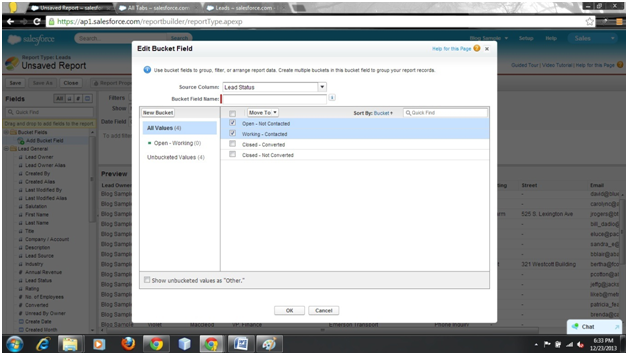
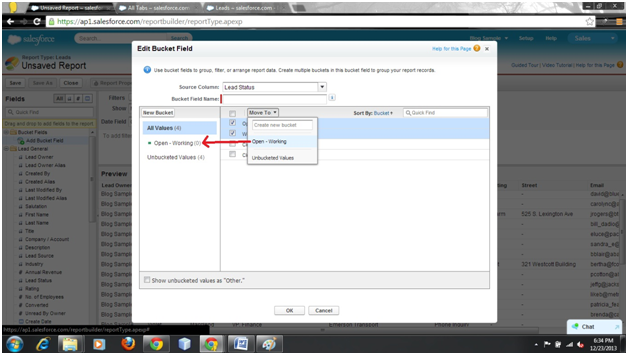
Click on the “New Bucket” button, create your criteria field “Open – Working”. Select two criteria “Open And Working” status
Step6 - Move this field into “Open And Working” Criteria
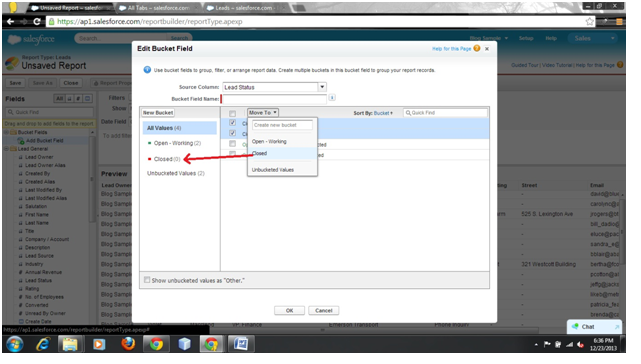
Step7 -Same process for close –converted and closed-Not converted field
Create a “New Bucket Closed” and drag these two closed fields into your closed bucket field
Click “OK” and then select the report as a “Summary Report”
Step8– Lastly you will get your report which is separated on the basis of “Open-working” and “Closed” status of bucket field


